|
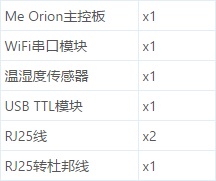
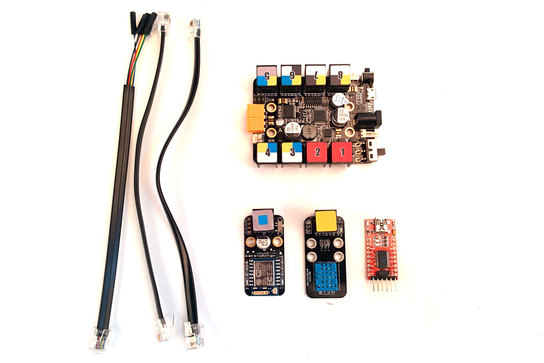
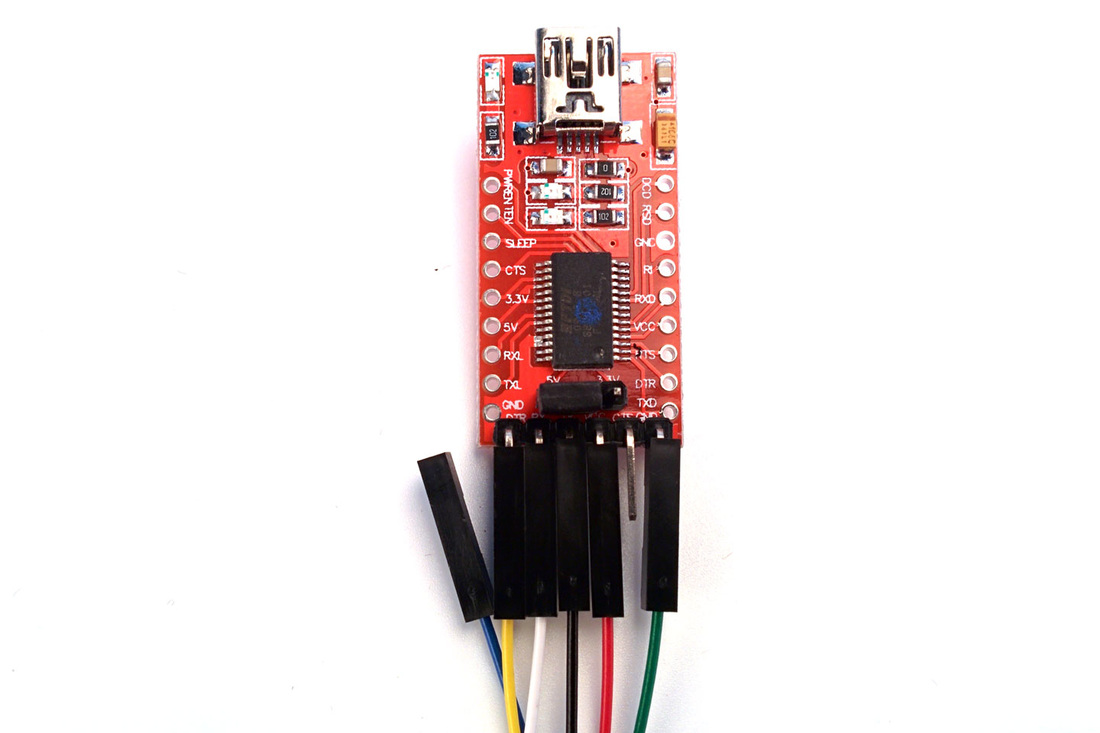
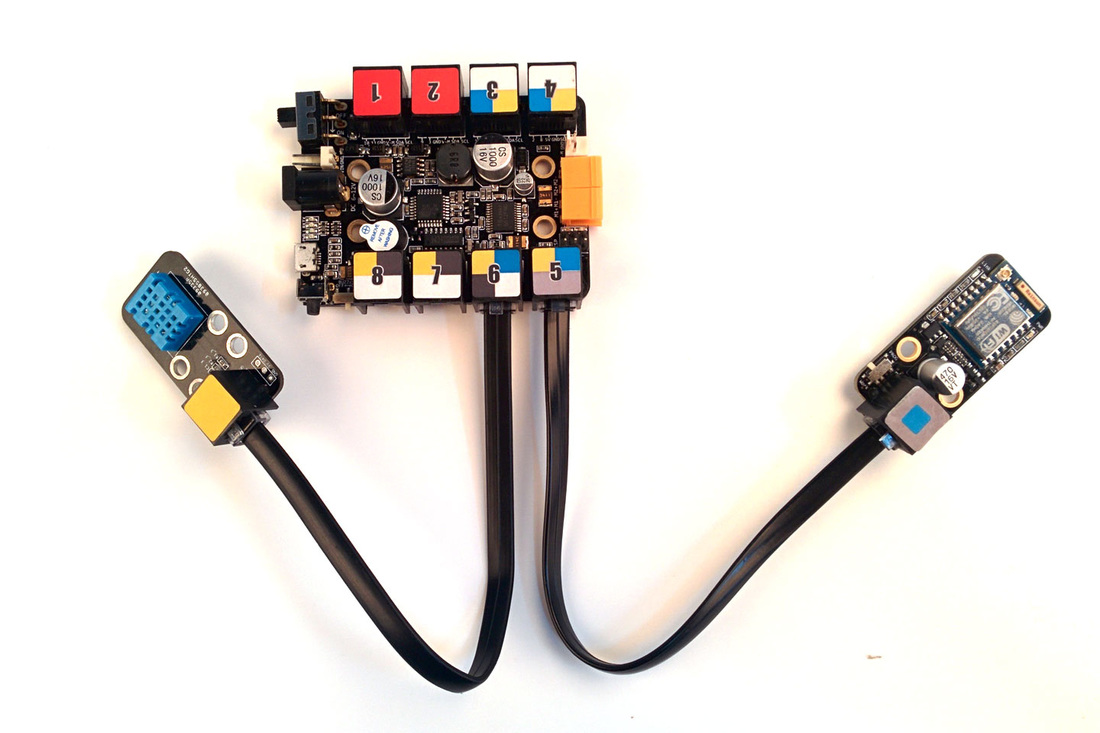
實現目標 每隔10分鐘,Me Orion主控板通過溫濕度感測器採集一次房間環境的溫度和濕度。採集成功後,將資料通過WiFi串口模組發送Http請求提交到雲端伺服器上。 著作權歸作者所有。 商業轉載請聯繫作者獲得授權,非商業轉載請注明出處。 作者:虎子哥 連結:http://bbs.makeblock.com/thread-797-1-1.html 來源:MakeBlock論壇 材料準備 組裝步驟 1、使用USB TTL模組為WiFi串口模組燒寫程式,主要實現WiFi模組通過無線路由器聯網功能和發送http請求 透過Arduino IDE程式設計的時候,需要把WiFi模組上的切換開關撥到prog模式,正常通訊模式為work。 詳細配置WiFi模組程式設計環境請參考http://bbs.makeblock.cc/thread-798-1-1.html ESP8266原始程式碼: ########代碼######## #include <ESP8266WiFi.h> void setup() { Serial.begin(115200); } int value = 0; String buffer = ""; void loop() { if(Serial.available()){ char c = Serial.read(); if(c=='\n'){ parseBuffer(); }else{ buffer+=c; } } } void parseBuffer(){ buffer = buffer+"/"; int count = 0; int startIndex = 0; int endIndex = 0; int len = buffer.length(); if(len<1){ return; } String tmp; String values[10]; while(true) { startIndex = buffer.indexOf("/", endIndex); endIndex = buffer.indexOf("/", startIndex + 1); tmp = buffer.substring(startIndex+1, endIndex); values[count] = tmp; count++; if(endIndex==len-1) break; } if(values[0].equals("setupwifi")){ setupWIFI(values[1],values[2]); } if(values[0].equals("wifistatus")){ wifiStatus(); } if(values[0].equals("request")){ sendRequest(values[1],values[2],values[3]); } Serial.println(buffer); buffer = ""; } void setupWIFI(String ssid, String password){ // We start by connecting to a WiFi network Serial.println(); Serial.println(); Serial.print("Connecting to "); Serial.println(ssid); WiFi.begin(ssid.c_str(), password.c_str()); while (WiFi.status() != WL_CONNECTED) { delay(500); Serial.print("."); } Serial.println(""); Serial.println("WiFi connected"); Serial.println("IP address: "); Serial.println(WiFi.localIP()); } void wifiStatus(){ Serial.print("/wifistatus/"); Serial.print(WiFi.status()); } void sendRequest(String host,String port,String url){ Serial.print("connecting to "); Serial.println(host); // Use WiFiClient class to create TCP connections WiFiClient client; const int httpPort = 80; if (!client.connect(host.c_str(), port.toInt())) { Serial.println("connection failed"); return; } url.replace("%2F","/"); Serial.print("Requesting URL: "); Serial.println(url); // This will send the request to the server client.print(String("GET ") + url + " HTTP/1.1\r\n" + "Host: " + host + "\r\n" + "Connection: close\r\n\r\n"); delay(10); // Read all the lines of the reply from server and print them to Serial while(client.available()){ String line = client.readStringUntil('\r'); Serial.print(line); } Serial.println(); Serial.println("closing connection"); } void urlencode(String str) { str.replace("/","%2F"); } void urldecode(String str) { str.replace("%2F","/"); } #########代碼######## 2、Me Orion驅動溫濕度感測器,定時採集溫濕度資料 3、登錄data.sparkfun.com,註冊帳號且將數據上傳。實現資料上傳到雲端。 Orion原始程式碼
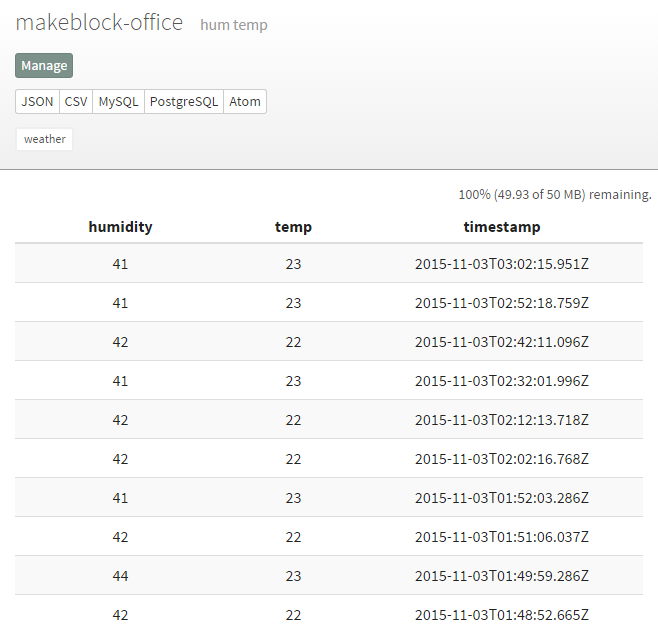
########代碼######## #include "MeOrion.h" #include "MeHumitureSensor.h" MeHumiture hs(PORT_6); const char* host = "data.sparkfun.com"; const char* streamId = "your stream id"; const char* privateKey = "your private key"; String buffer = ""; void setup() { // put your setup code here, to run once: Serial.begin(115200); delay(3000); Serial.print("/setupwifi/your wifi ssid/your wifi password\n"); delay(3000); } // We now create a URI for the request double lastTime = 0; void loop() { if(millis()/1000-lastTime>600){ hs.update(); String url = "/input/"; url += streamId; url += "?private_key="; url += privateKey; url += "&humidity="; url += hs.getHumidity(); url += "&temp="; url += hs.getTemperature(); Serial.print("/request/data.sparkfun.com/80/"); url.replace("/","%2F"); Serial.print(url); Serial.print("\n"); lastTime = millis()/1000; } } void urlencode(String input) { input.replace("/","%2F"); } void urldecode(String input) { input.replace("%2F","/"); } ########代碼######## 效果查看 sparkfun data:https://data.sparkfun.com/makeblock
0 評論
發表回覆。 |

 RSS 訂閱
